 |
|||||||||
| |
|
|
|
|
|
|
|
|
|
Example 3 Solution: Temple Dragon
![]() There is a movie version of this solution.
There is a movie version of this solution.
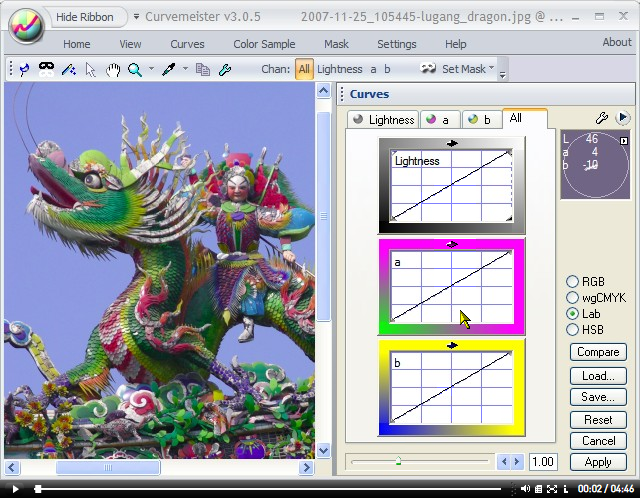
As with the previous two examples, the object is to crank up the colors.
|
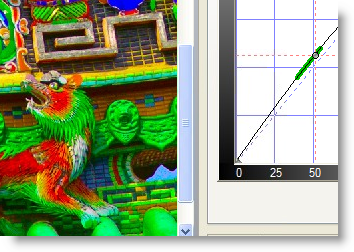
No reference color is set, and the saturation is increased to just before the magenta areas start to lose detail. Think of each half of the a curve as two separate curves, one controlling magenta, and the other controlling green.
|
 |
|
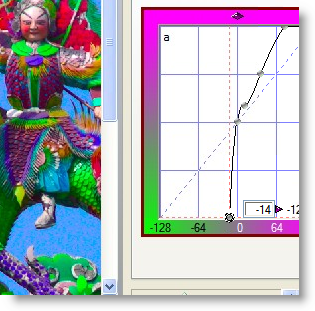
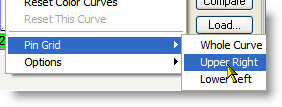
Since magenta is cranked up as far as it will go, right click on the curve and pin the upper right half of the curve, locking it in place.
Now make the green half of the a curve as steep as possible, without losing detail. Now that's some kind of green! |
 |
|
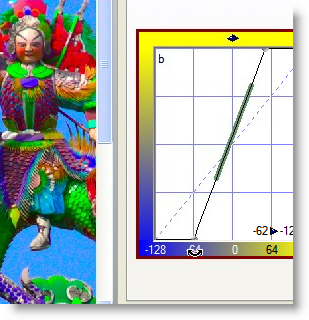
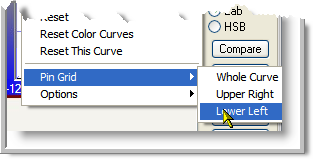
Click on the b tab, and drag the cursor in the margin of the curve, rotating it until either blue or yellow objects start to lose detail. In this case, the blue objects start to blow out well before the yellow. To keep the blue half of the curve in place, pin the lower left corner of the curve.
|
 |
|
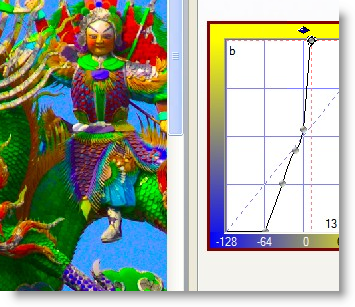
Now we crank up the yellow. This is generally a tough color to overdo, so we make it as steep as possible, without distorting the shape of the blue half of the curve. These are some kind of colors we're looking at here! |
 |
|
After brightening the image slightly, I check the rest of the image for any surprises, such as blown out reds, blues, or greens. |
 |
|
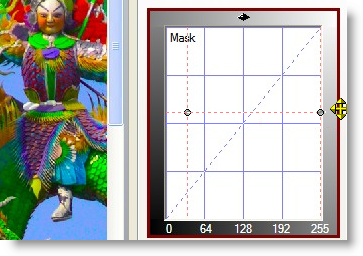
Now we use the "mask as slider" trick, setting a horizontal curve in the mask, selecting both ends, and moving the line vertically to control the amount of our intense colors that we want to retain in the final image. In this case, we keep just over half of the adjustment. |
 |
|
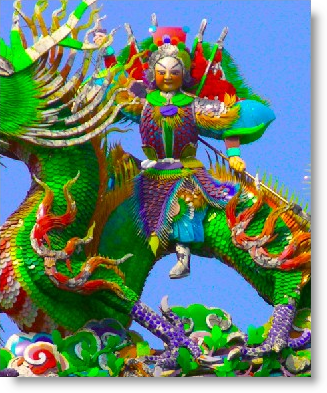
That's it - the final image is on the right. Compare it to the original image at the top of the page. It looks the way it must have when it was brand new, and first unveiled to the world. Happy curving! |
 |
|
 Site designed by Paradox Media |