 |
|||||||||
| |
|
|
|
|
|
|
|
|
|
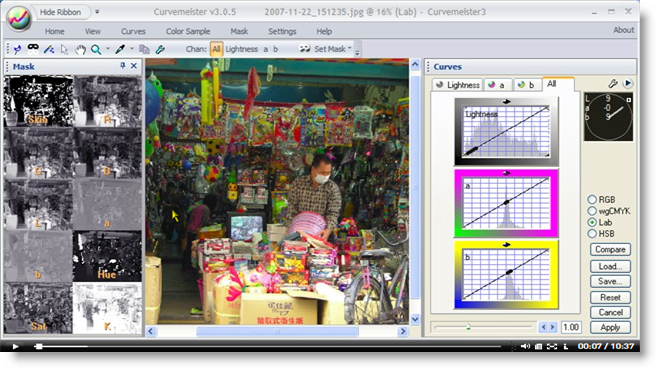
Example 6 Solution: Taipei Toy Store
![]() There is a video version of this solution, highly recommended.
There is a video version of this solution, highly recommended.
This image could use a little more color in the darker areas.
|
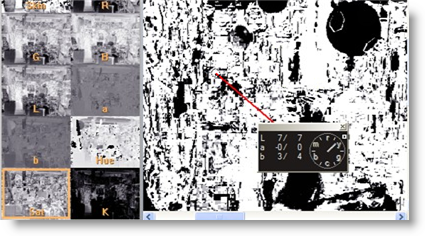
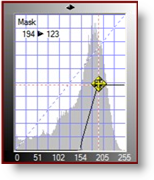
While selecting a mask for this image, I first settled on the L channel. This seemed reasonable, since the dark areas in the back of the store were also the ones that needed a color boost. Here is the L channel, curved to give good contrast between the toys in the background and more brightly lit ones in the front center of the image. I have also inverted the L channel, so that the mask is white in the ares that I want to add color to. |
 |
|
Using the L channel this way certainly adds color to the darker areas, but there are some real problems with some parts of the image. |
 |
|
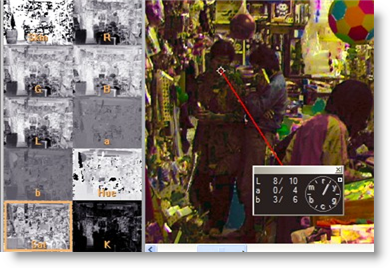
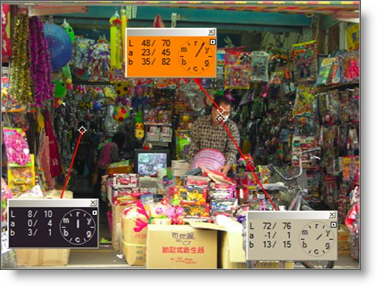
One problem area is the shopkeeper's hair - although the hair itself looks OK, the edges take on a very unnatural red-orange glow. It turns out that this effect is hard to get rid of. I can make the fringe narrower by tweaking the mask curve, but the only way to get rid of it is by losing color in the very areas - the darker toys in the background - that need color. |
 |
|
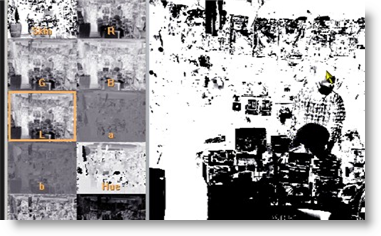
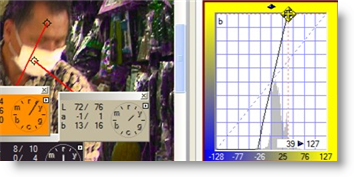
So, I continue channel surfing, and find that, although the Saturation channel looks like a noisy mess, it does a very fine job of separating areas that already have color from areas, such as the dark toys, that do not have color. The black objects, such as the brightly colored soccer ball, show up as black circles in the image on the right.
|
 |
|
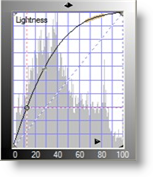
I adjust the a and b curve endpoints to get the skin tone close to the nominal value, with a reasonably colorful background. The next step is a Lightness curve that brings out more detal. Because of the mask, only nearly gray areas can be affected by the curve.
|
 |
|
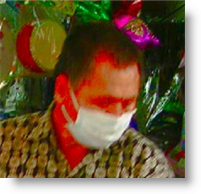
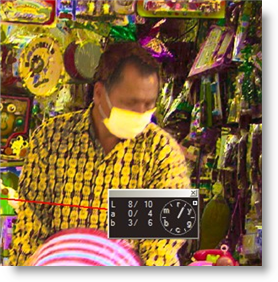
Now I check back with the shopkeeper, and although it's respectable looking, there are indeed some adjustments necessary. The face mask, which is white, has a yellow cast, and the shirt and skin tone is too saturated. |
 |
|
The first thing I do is back off on the mask a bit, retaining most of the color and lightness in the background, and reducing the amount of change in the man's shirt and skin tone. |
 |
|
Next, I adjust the b curve to minimize the yellow tint of the mask, and reduce the saturation of the skin tone. |
 |
|
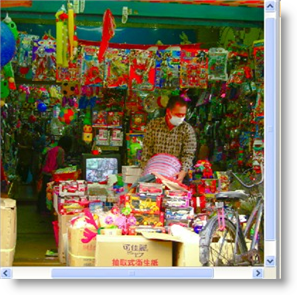
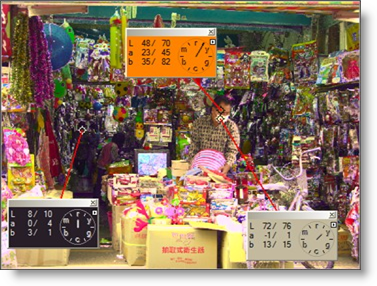
Here's the final adjusted image. There is more sparkle and color in the toys, compared to the original image below.
|
|
|
If you find the effect is too strong, and want to back off on the amount of change, drag the upper right corner of the mask curve downward as shown on the right. This acts like a fader, and smoothly reduces the amount of the correction that is applied to the image. |
 |
Thanks for watching, and happy curving!
|
 Site designed by Paradox Media |