 |
|||||||||
| |
|
|
|
|
|
|
|
|
|
Example 2 Solution : Sun Moon Lake Harbor
![]() There is a video version of this solution.
There is a video version of this solution.
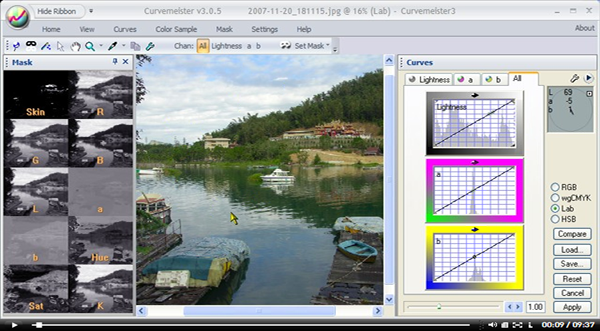
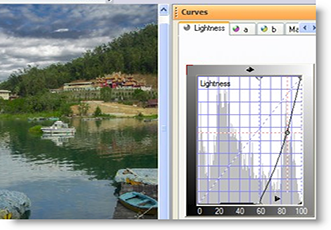
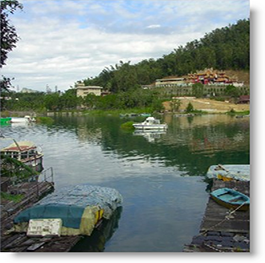
As with many outdoor shots, the sky contains detail, but it is too dark.
|
This is a fairly complex image, and there are several things to think about before we tackle it.
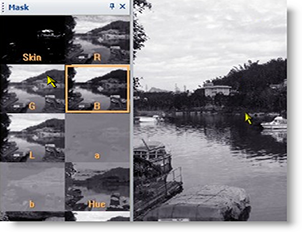
When we go channel cruising, we'll be looking for a mask that is light where we want to change things, and dark where we want to keep things the same, or the other way around. |
 |
|
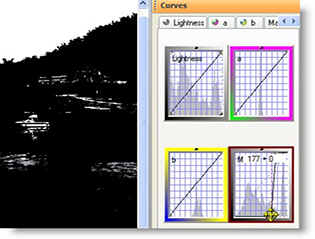
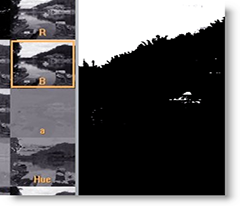
To check out all the potential masks, click on the mask icon in the main tool palette, shown above, and make sure the Mask Carte is visible, as shown on the right. Now you can click on each item in the carte, and see a big version of the image in the preview window. A quick glance at the carte shows that R, G, B, L, and K (bottom right) provide a conspicuously light color for the sky. In this case, I have the blue channel selected. Naturally, you would use larger versions of these windows. If you have a second monitor, click on the top margin of the Mask Carte and drag it to your second monitor, so that you can resize it to as large a size as possible. I call the process of checking out each mask channel surfing.
|
 |
|
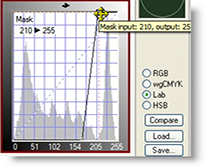
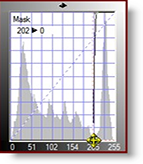
Several of the channels are good contenders. I decide on the K channel, and move the bottom right end of the mask curve to make the dark, non sky, areas as black as possible. Using this mask, the two blue rowboats are still too light (not visible here), but the white boat is still going to be darkened with this particular mask. |
 |
|
Here we go with the upper right corner of the mask curve, making the sky as pure white as possible. This is important, because if we leave any detail showing in the area we want to darken, we'll darken the bright areas more than the darker areas, and lose contrast, which is contrary to our goal of adding contrast. |
 |
|
A little fine tuning of the lower left end of the curve, and we have a pretty good looking mask. Let's try a different mask channel |
 |
|
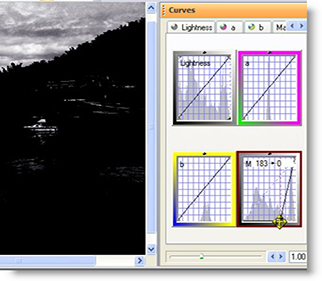
The B channel of RGB is often a good mask for skys, for the simple reason that the sky is blue. Using the curve shown below, I am able to get a pure blue sky, black out the water reflections, and to black out the two blue rowboats.
There is one problem, though, with this curve, and that is that it is too extreme. An almost vertical curve like this one is prone to create a jaggy appearance. Although the jaggies are not shown here, you can verify this easily yourself. |
 |
|
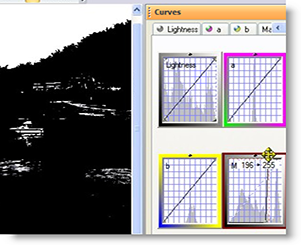
So I back off a bit, and use a less extreme curve, as shown on the right. |
 |
|
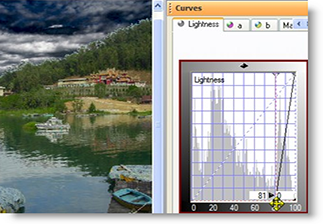
Now that we have a good mask, let's play around a bit. Using an exaggerated Lightness curve, we can make the sky insanely dark. As was the case with using an extreme curve for the mask, we get strange, white jaggies along the tops of the trees, almost as if they were snow capped. The poor white boat looks as if someone dumped toxic material on it. The answer is a less extreme curve |
 |
|
Backing off to a more reasonable curve minimizes the jaggies, and also looks more natural. |
 |
|
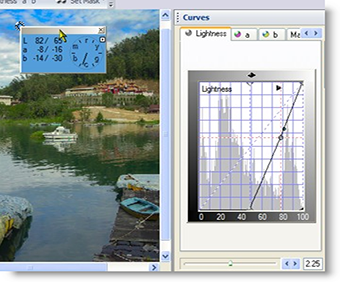
Now let's add some color to the sky. First I alt click on the sky to create a hue clock, and then I bump the saturation, using the slider available in Lab mode. Remember that skies should be on the cyan side of blue, or about 7:30 on the hue clock. This clock is more like 6:45, indicating it is a bit too cyan. If you have normal color vision, you'll notice that the sky has a sort of candy, exaggerated appearance. This is easy to fix in Lab mode. |
 |
|
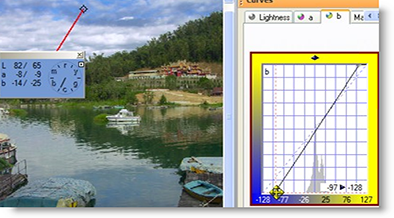
To improve the sky color I first go to the a channel, and move the blue end point inward, increasing the amount of blue.Remember the imaginary piece of string connecting the end of the clock hand with the letter b? We are now at 7:00 on the hue clock: better, but still a little way to go. We cannot increase the blue much more without pushing everything over the edge, making the white clouds blue as well. |
 |
|
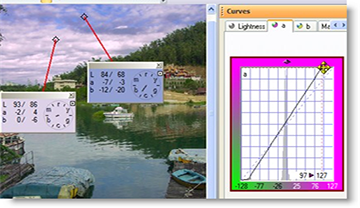
It;s important to keep the white, fluffy clouds as close to neutral as possible, so I alt clicked on a thick section of clouds, creating a new hue clock. Adjusting the end points of the a curve, I zeroed in on a more blue sky, while keeping the clouds reasonalby close to neutral. |
 |
|
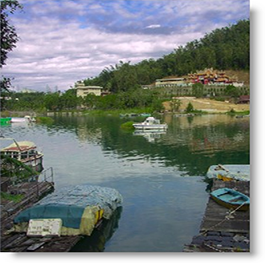
Here's the image before and after the change. Much better. We'll be revisiting this image later, with a trick to keep the white boat from darkening. Happy curving! |
|
|
 Site designed by Paradox Media |