 |
|||||||||
| |
|
|
|
|
|
|
|
|
|
Example 7: Painting a Car Yellow
![]() There is a video version of this solution.
There is a video version of this solution.

Let's use curves to make this car yellow, once in Lab, and again in HSB.
|
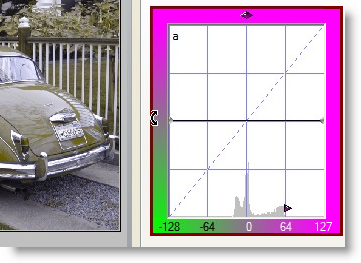
In Lab yellow lives in the b channel, so we start by removing all the red from the car. Note: If we wanted to retain the green, that could be done by adding extra points to keep the lower left part of the curve in place. |
 |
|
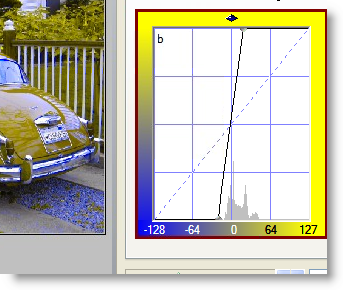
Since it's yellow we're after, let's bump the b channel as much as possible, injecting additional color into the car. We've now removed all the red, and maximized the yellow in the car, but the color is more of a dark tan than a yellow. Notice that the gravel has turned a rather bright blue. You can prevent this, if you wish, by adding more curve points to keep the lower left portion of the curve in its origial position |
 |
|
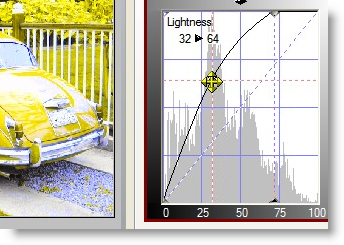
Yellow is a much brighter color than red. To make a color brighter in Lab mode, we turn to the Lightness curve. Here's the curve we use, and voila, a very bright yellow car. |
 |
|
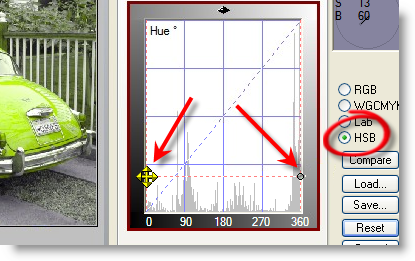
There is another way to get a yellow car, in HSB mode. Start by clicking on the HSB radio button, and then move the endpoints of the Hue curve, forming a horizontal line as shown. The car is a yellow green, close to the final yellow. |
 |
|
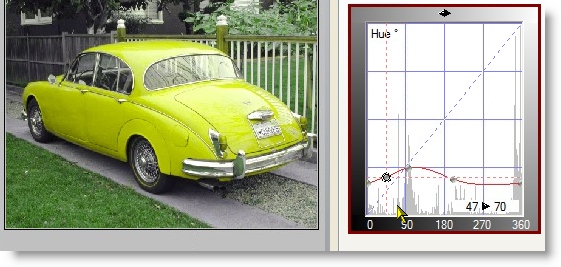
Select both ends of the Hue curve by ctrl clicking on them until both ends show the shimmering "marching ants" pattern. With both end of the line selected, you can drag the curve vertically with the mouse, or use the up and down arrow keys to fine tune the color to the shade of yellow that you want. |
 |
|
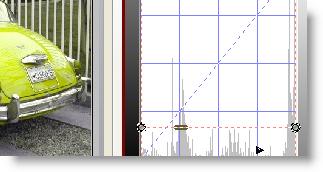
We saw how to keep the grass green in Lab mode. In HSB it's also pretty easy to selectively alter the color of the grass. First alt-click on the grass so that we can keep track of the color. Notice the color worm (circled in red) on the curve. This is where we want to add a bump to the curve to make the grass green again. There also happens to be a peak in the histogram at this point. |
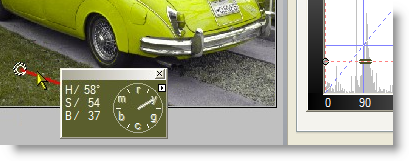 |
Here's the final HSB image, with a bump added to restore the green color of the grass. Although it was not really necessary, I've also modified the Brightness curve slightly, and added some brightness to the image.
That's the last example for this week - happy curving!
|
 Site designed by Paradox Media |