 |
|||||||||
| |
|
|
|
|
|
|
|
|
|
Example 4: Skin Tones are not Just for People Anymore

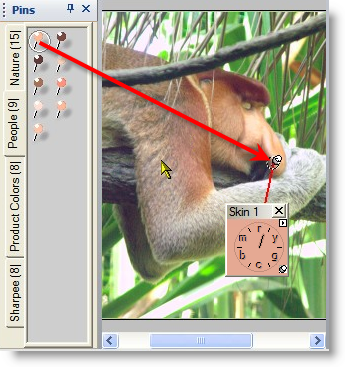
Open the pin palette by clicking on the pin icon
|
Let's start with the a direct approach - dragging the first skin tone pin to a medium area of skin tone. The result is an instant improvement in the skin tone, a reduction of the green color cast, and a comnpletely satisfactory solution to this exercise. If we were in a hurry, we'd set shadow and highlight, give ourselves a pat on the back, and move on. I've got more time to shoot for a better result. Let's see what we can do by manually adjusting the a and b curves. |
 |
|
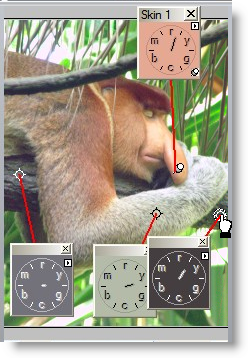
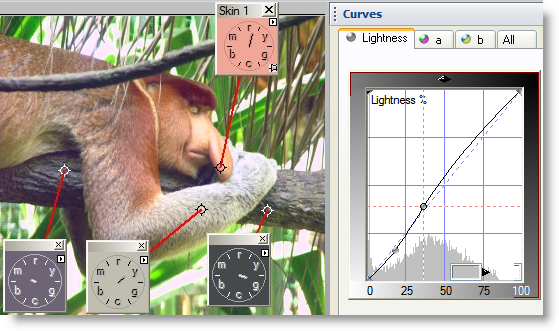
First, I alt click on some areas that I am reasonably sure should be neutral - in this case the gray area of the monkey's arm, and various areas on the tree branch. Although these areas appear to be neutral, the hue clock shows that they vary from orange to yellow-green.
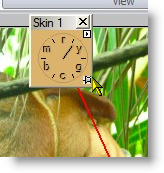
To give myself more freedom with the a and b curves, I unlock the skin tone pin. Now it is functioning only as an indicator, and I'll keep the hand of the hue clock between 12 and 1 o'clock. |
 |
|
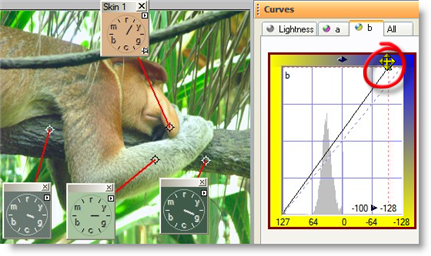
Just as in the image with the fruit, I alternate between the a and b curves, adjusting the b curve until the clocks point to green, then switch to the a curve.
|
 |
|
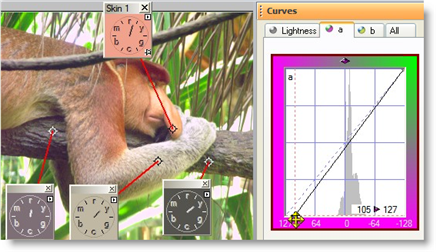
I've increased the magenta, and pointed the hue clocks approximately toward yellow.
|
 |
|
Here I am after several iterations of the a and b curves. The hue clocks are pretty darn good, with the hands of theneutral hue clocks shorter than they were with the simple pin operation. The skin tone is about where it was. |
 |
|
|
|
That's it for this example - remember skin tones can be a good guess for many animal colors.
Happy Curving!
|
 Site designed by Paradox Media |