 |
|||||||||
| |
|
|
|
|
|
|
|
|
|
Example 2 - Fruit Vendor, Multiple Neutrals
![]() There is a video version of this solution.
There is a video version of this solution.
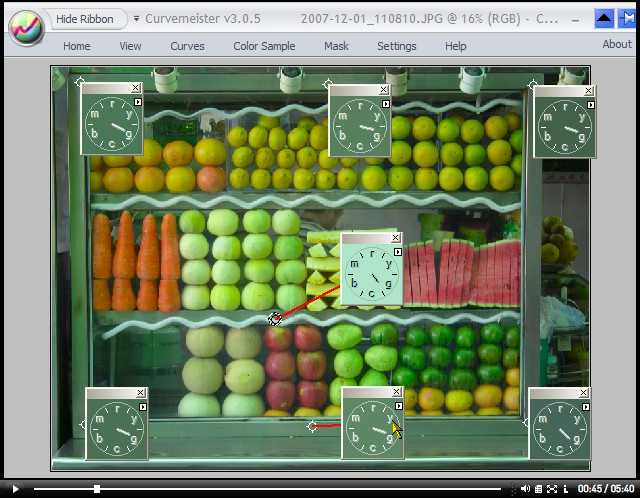
The fruit vendor image has different hues for areas that should all
be neutral. Let's use both Lab and RGB to fix this problem.
|
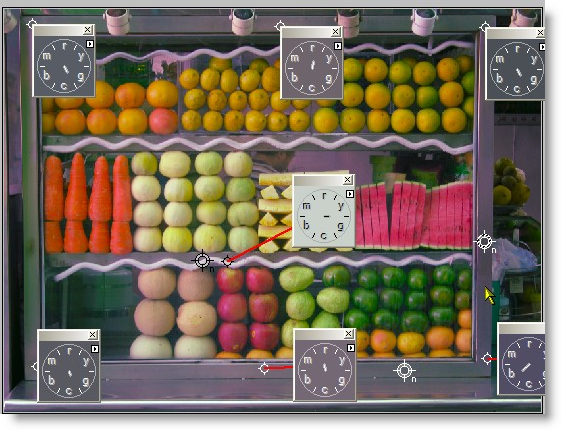
This is the fruit vendor image from week 2. It has a subtle mixed lighting situation, as shown by the fact that the various brightness of stainless steel, and the frost on the refrigeration coils are various hues of green, probably due to fluorescent lighting. This is a relatively consistent color cast, and in RGB mode we can get a very acceptable result by creating multiple neutrals on the window frame, and on the bright area of the frost, until the hue clocks are approximately neutral. This is shown on the right, with the neutral in the lower right corner of the image. Life is not perfect, and in this case we settle for a bit more blue in the lower right corner than we would like. Multiple neutrals only work in RGB and CMYK mode - in Lab only the last neutral you clicked on will be active - the rest will have a red X through them. |
|
|
In Lab mode, only one neutral is possible, and you'll need to drag it to a very carefully chosen spot, watching the hue clocks as you do so. This is, in fact, the way we did this example last week. Let's do this another way, by manually moving the ends of the a and b curves to minimize the color cast. Since the color cast is green, I start by moving the magenta end of the a curve, adding magenta to the image. I stop when the hue clock points to yellow, since yellow, and it's complimentary color are controlled by the b curve. Note: we could also control the color cast by moving the green end of the curve. We would choose to do this if we wanted to reduce the color saturation of the image.
|
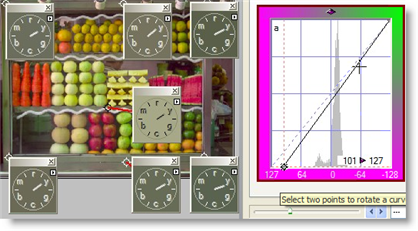 Dragging the magenta end of the a curve removes green. |
|
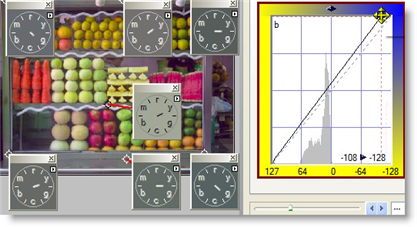
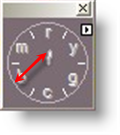
Now I drag the blue end of the b curve, until the hue clocks point to green again. The hand of the hue clock is shorter, which shows that I am zeroing in on my goal of achieving a more neutral color. The individual hue clocks are also starting to point in different directions, indicating that we can only improve things to a certain point. When making an adjustment like this, I find it helps to think of a piece of string going from the end of the hue clock hand to the color you are adjusting, blue in this case.
|
 |
|
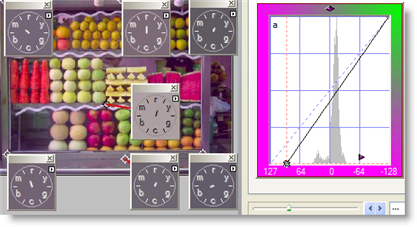
After several adjustments, going back and forth between the a and b curves, I get the hue clocks looking pretty darn close to neutral. When I have to leave a slight color cast in an image, I generally choose to make the image warmer, and I do so in this case because I want to bring out the bright colors of the fruits. I'm guessing, and you may want to try this, that manually adjusting the curves in RGB mode could get the neutrals even closer to pure gray than this. Remember the string trick - it works just as well in RGB as in Lab. |
 |
That's all - thanks for watching, and happy curving!
|
 Site designed by Paradox Media |