 |
|||||||||
| |
|
|
|
|
|
|
|
|
|
Example 5: Berkeley Drummers
![]() There is a video version of this solution
There is a video version of this solution
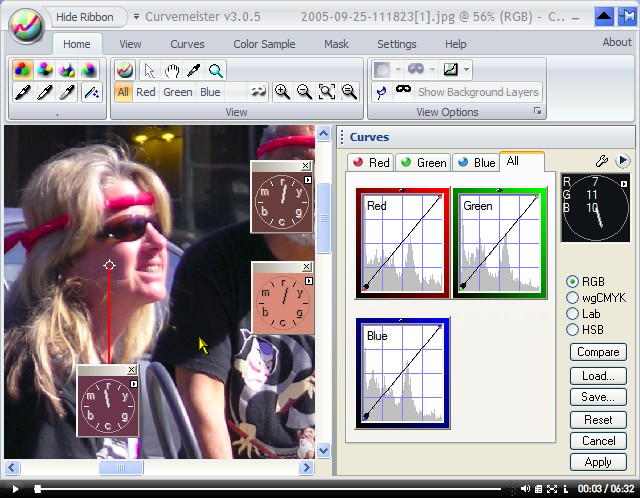
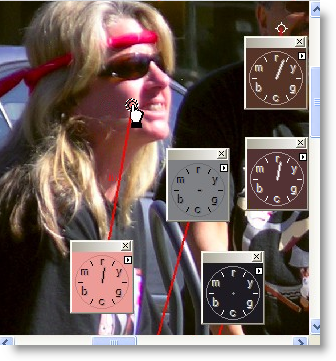
I've alt-clicked on representative skin tones - the woman's cheek is outside the lunch hour" range.
|
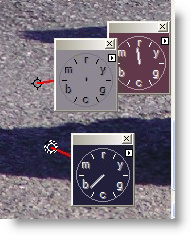
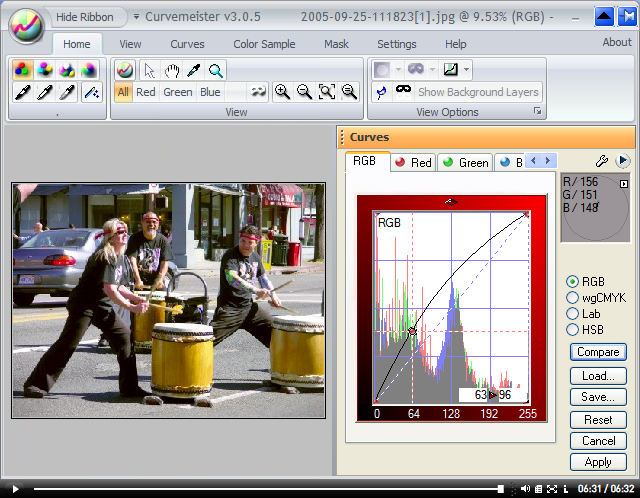
Before we get started with the skin tones, though, let's pay close attention to one very big and obvious neutral - the road pavement. Alt-clicking on bright and dark areas of the road show a typical mixed-light situation: blue shadows. It turns out that we can fix the skin tones simply by fixing the neutral. Let's see how this works. |
 |
|
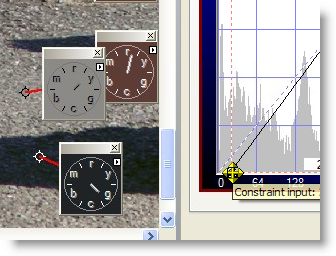
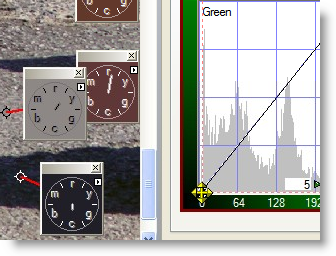
For blue shadows, I generally turn first to RGB, and move the dark (normally lower left) end of the blue curve inward, sucking blue out of the shadows, and incidentally, improving the skin tone indicated on the upper right hue clock. I stop when the hue clock for the dark shadow points to green, an indication that I have removed enough blue for now, and need to switch to the green curve.
|
 |
|
Not bad - the shadow is almost perfectly neutral, and as a side benefit, the skin tone is improved, being more in the middle of the 12 to 1 o'clock "lunch hour".
|
 |
|
The skin tones are not bad, but there is at least one more problem. The skin tones are too saturated, as indicated by the length of the hue clock hand. It should be more the length of an hour hand, just barely reachng the letters around the rim of the hue clock.
|
 |
|
To finish up, I used the RGB composite curve to brighten up the shadows just a bit. Another choice would be to click the Apply button at this point, and come back for another pass in Lab mode, using the Lightness curve. |
|

That's it for now - happy curving!
|
 Site designed by Paradox Media |