 |
|||||||||
| |
|
|
|
|
|
|
|
|
|
Example 2 Solution: Monterey Bay
![]() There is a video version.of this solution
There is a video version.of this solution
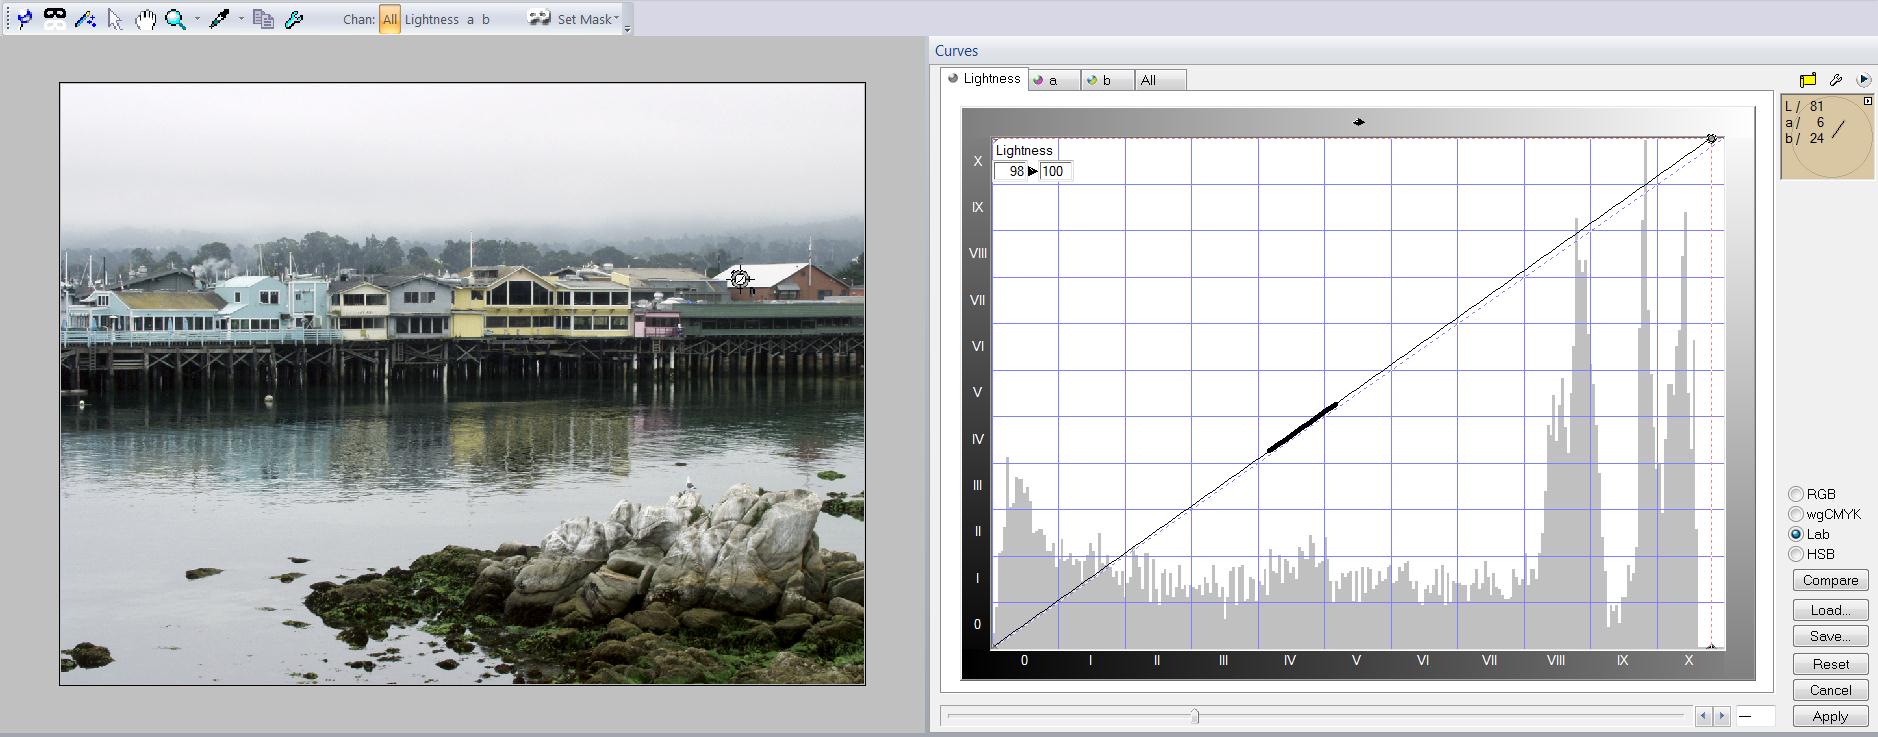
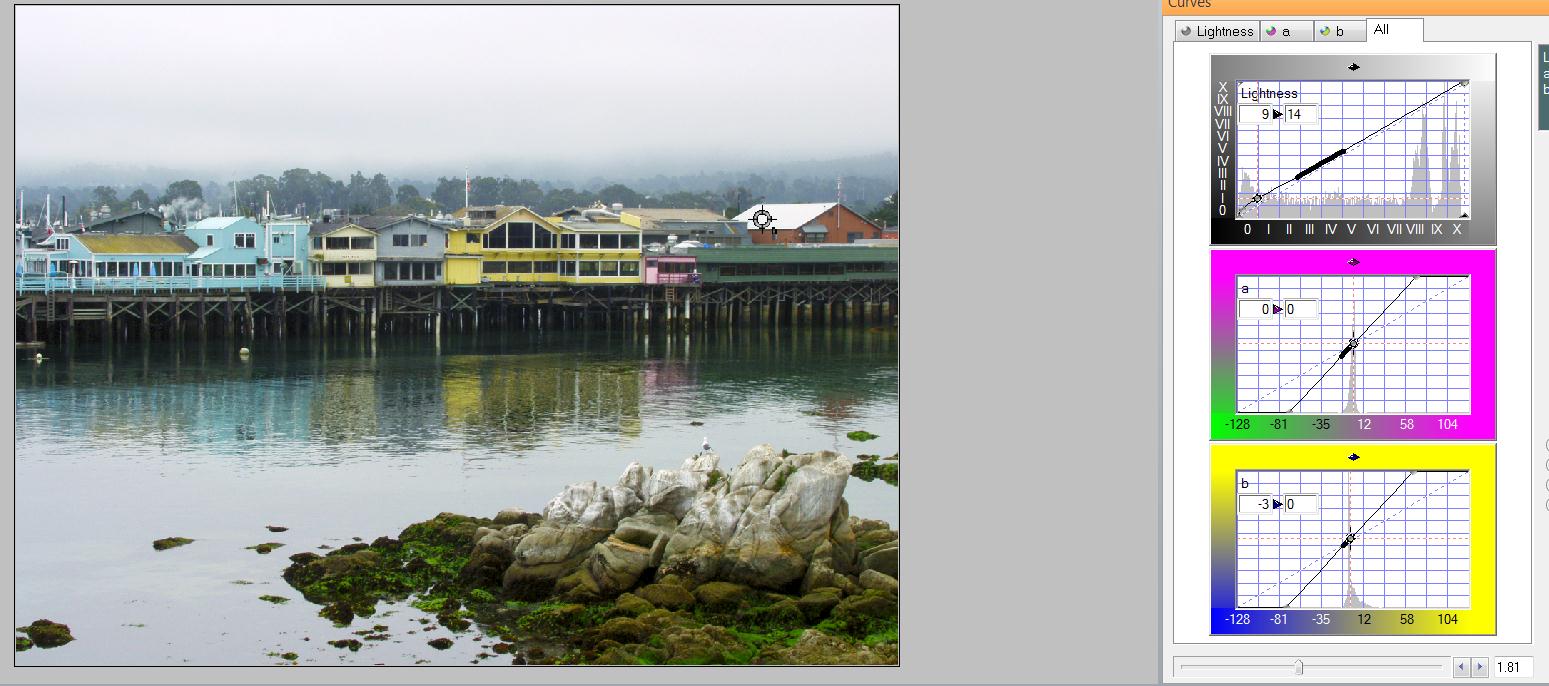
The shadow, highlight, and neutral drill should be familiar to you by now. All three are visible above - can you spot them?
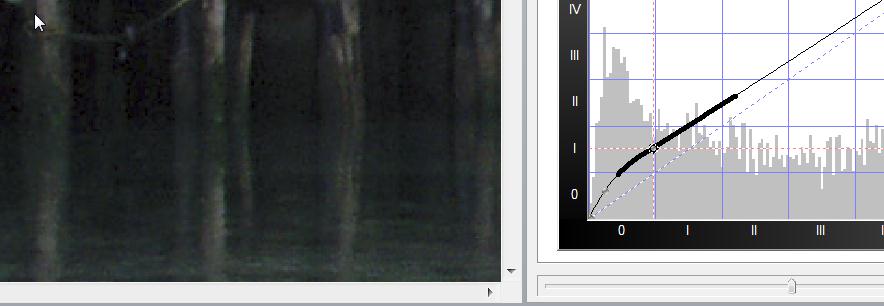
Let's start with Lab mode and set the shadow. The shadows do have some details in them and we need to bring them out. We can apply a curve move called a Lizard tail" that helps is save the shadows and highlights. If you look at the lower image we have lifted the shadows by placing a point on the curve and moving it straight up. This opens the entire image. We add an additional control point further to the right and move the curve back to the center line. This restores the tonal range to the image and leaves the shadows open. The highlight is found by moving the highlight side of the curve until the sky just starts to break through the threshold. It should have little white dots in it.
|
|
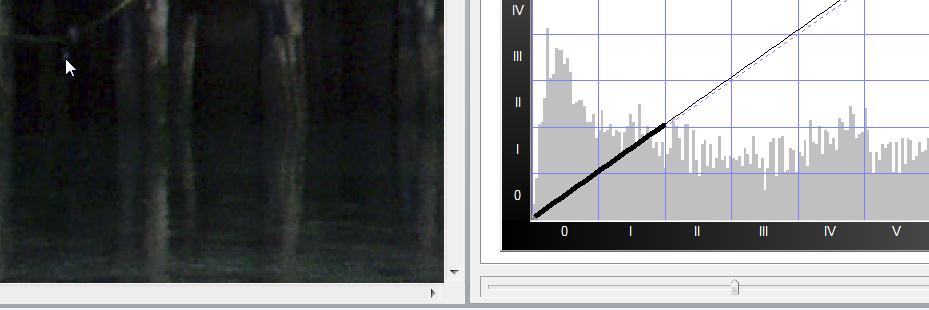
The shadows need help. Let's apply a curve move to fix them.
|
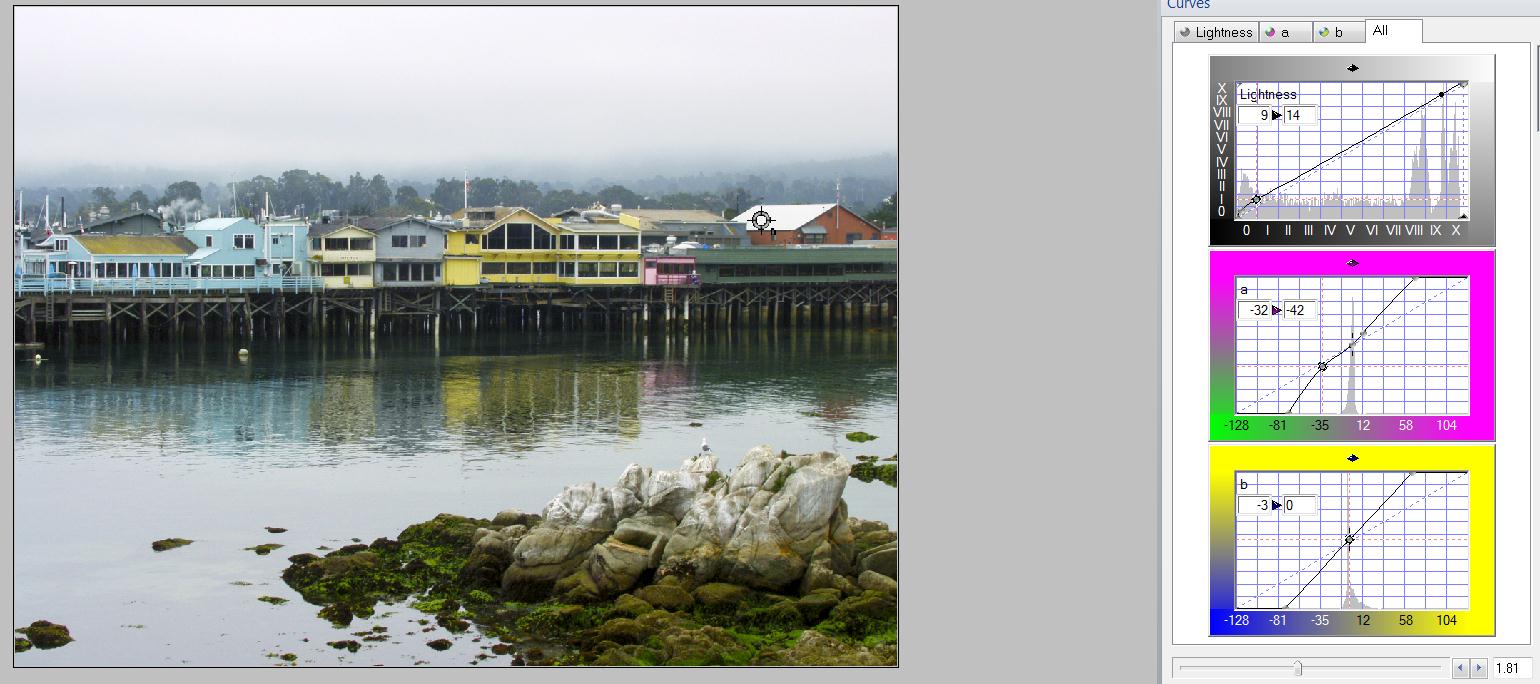
Ok, that takes care of the shadow and highlight. Now how about a neutral? Because it's generally more useful to have the Neutral near the midtone, we generally start off by looking for something that we know has no color, and it about midway between the shadow and highlight. But all we have is white Roofs and "off color" rocks that might not be neutral. You're going to love this. A neutral does not have not be a solid color - just an area with no color in it. For example, it's perfectly ok to use a printed sheet of white newspaper as a neutral, because the black letters on white make a wonderful neutral. As luck would have it, we have such a area in the image the white roof! Here is our image with the S/H/N set.
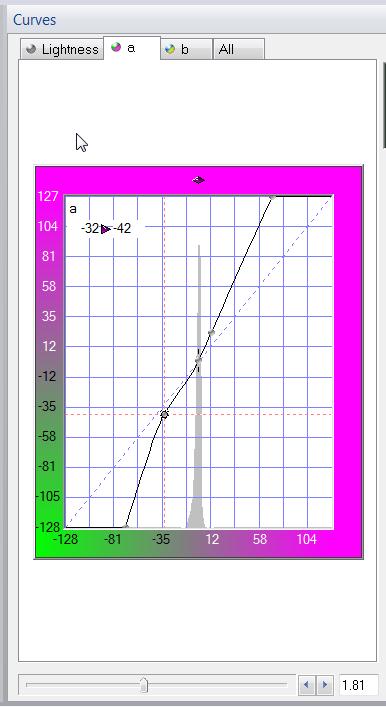
In Lab, we have complete control over saturation using the slider at the bottom of the curve window. After zooming out and playing with the slider a bit, we see that theGreen Grass tends to blow out well before the other colors. Zooming in allows us to increase the saturation just to the point where we would lose detail, and no further. We can control just the greens in LAB by adjusting the A channel a bit Add a control point below the center of the curve on the green side and flatten the curve just a bit. This will reduce the saturation on the greens and make the image look more balanced.
|
|
|
|
The saturation Slider makes fast work of saturating the image.
Get control over the Green by flattening the curve slightly. |
|
Here is a look at One possible solution for this image. |
|
|
|
 |
That's it! Thanks for reading, and happy curving!
|
 Site designed by Paradox Media |